
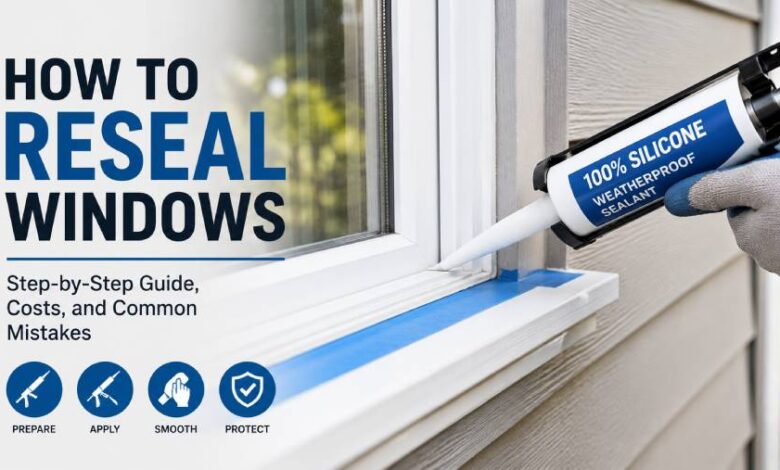
How to reseal windows comes down to one non-negotiable rule: strip out every trace of the old, failed sealant, get the joint clean and bone dry, then lay a single continuous bead of the right product for that surface — smearing fresh caulk over cracked caulk is the single most common reason a resealing job fails within a season. That much is simple. What trips homeowners up is everything around it: figuring out which of the four different “window seals” actually failed, picking a sealant that won’t shrink off vinyl or yellow in the sun, knowing which gaps must be left open on purpose, and deciding when the job has quietly stopped being a caulk-gun problem and become a glass replacement. This guide walks through the whole thing the way a working tradesperson would approach it — diagnosis first, materials second, technique third — along with realistic costs, timing, safety notes, and the mistakes that send people back up the ladder a year later.
What “Resealing a Window” Actually Means
Resealing is not one repair, and the confusion costs people money. In everyday use the phrase covers the flexible bead of sealant where the window frame meets the surrounding wall, siding, brick, or trim — a joint that has to stay watertight while the building and the frame expand and contract at different rates through the year. That perimeter joint is what a caulk gun fixes. But homeowners also say “my window seal is broken” when the compression gasket on a moving sash has gone hard, when the putty holding an old single pane has crumbled, or when a double-glazed unit has fogged internally. Those three problems need different repairs entirely, and none of them improves with more caulk. Getting the terminology straight matters because window seal repair quotes vary enormously depending on which failure a contractor is actually pricing.
Signs Your Window Seals Have Failed
The symptoms are usually visible before they’re expensive. Look for a bead that has cracked along its length, shrunk back from the frame, chalked to a powdery surface, or peeled away from the substrate entirely — visual inspection for cracking, dusting or powdering, shrinkage, and areas where the caulk is no longer sticking is the most reliable check. Inside, a draft you can feel near the window on windy days often signals failed sealant, while damp along the interior trim, or discoloration and mold near the frame edges, points to trapped moisture behind deteriorating material. For pinpointing leaks, move a lit candle slowly along the window edges from inside and watch for strong flickering, ideally on a windy day when drafts are easier to detect — hold it well clear of curtains and never use an open flame near fuel-burning appliances or gas fittings. Rising heating bills with no change in habits are a softer signal, but a real one, since the EPA estimates that proper insulating and air-sealing measures can save homeowners up to 20 percent of heating and cooling costs, or up to 10 percent of total energy costs.
Diagnosing Which Seal Failed Before You Buy Anything
Spend ten minutes here and you may save several hundred dollars. Press a finger along the perimeter bead: if it cracks, lifts, or has visibly pulled away from the frame or masonry, that is a straightforward recaulking job. If the bead is intact but you still feel air movement with the window closed and latched, the fault is the weatherstrip on the sash, and caulk is only appropriate for fixed components while weatherstripping handles movable parts — sealing a sash shut is a repair you will regret immediately. If an older single-glazed pane rattles when tapped, the glazing compound has failed: scrape out the old glazing, clean the glass and frame edges, bed new compound at roughly a 20 to 45-degree slope between glass and frame, and allow at least several days of drying before painting. And if there is condensation or a permanent haze between the panes, that indicates a failed insulated glass unit — the argon or krypton fill has escaped, no sealant applied from outside will clear it, and you are looking at a glass unit swap rather than a resealing job.
Tools and Materials for the Job
The kit is short and inexpensive. You need a caulking gun — a smooth-rod dripless model gives noticeably better control than a basic ratchet handle — a utility knife or dedicated caulk removal tool, a stiff putty knife or scraper, a wire brush for stubborn residue, denatured alcohol or mineral spirits with clean lint-free cloths, painter’s tape, and a smoothing tool (a wet fingertip or a plastic profiling tool both work). For anything wider than a pencil, add foam backer rod: it seals the crack and provides a better surface for sealant without requiring excessive amounts of product. Manufacturer guidance is specific on this point — joint width should not exceed half an inch, and where joint depth exceeds half an inch, foam backer rod should be used. A caulk softening product is optional but genuinely speeds up removal; apply it along the old seams and allow roughly two hours to work before scraping. Budget one 10-ounce cartridge per two to three average windows, and note that materials alone typically run about $15 to $18 per seal, though this varies by product and region.
Choosing the Right Sealant for Your Frame and Climate
Product choice is where most durability is won or lost. For exterior windows, use 100% silicone or a high-quality hybrid formula that resists UV, temperature extremes, and moisture, since these flex with seasonal movement without cracking; latex or acrylic works well indoors, cleans up with water, and accepts paint readily. Polyurethane is another strong exterior option — durable and highly adhesive — though it reacts poorly to prolonged direct sunlight, which is worth weighing on south-facing elevations, while acrylic-based exterior caulking generally needs replacing within about five years. One trade-off to plan around: many pure silicones cannot be painted, so surfaces should be painted before the sealant is applied, and if the joint must be painted afterwards you need a product explicitly labelled paintable. Avoid using interior caulk outside even for small repairs, since it may not cope with moisture, UV exposure, or freeze-thaw cycles. Check compatibility with your frame material too — vinyl, aluminum, wood, and fibre-cement all appear on quality sealant labels, and a mismatch shows up as adhesion failure long before the product itself wears out.
How to Reseal Windows: Step by Step
Work one window at a time and resist the urge to rush the removal stage, because 80% of the result is determined before the gun comes out. Score both edges of the existing bead with a utility knife or removal tool, then lever the old material out with a putty knife, working slowly enough that you do not gouge vinyl or scratch the frame. Clean the empty joint back to bare, sound substrate — dirt, grease, or even slight moisture prevents adhesion and shortens the seal’s lifespan, so wash the area, let it dry thoroughly, and sand lightly so the new bead bonds smoothly. If you used a chemical remover, be disciplined about it: used excessively or left on too long, removers can harm surrounding finishes, and chemical residue interferes with the new caulk. Push backer rod into any gap deeper or wider than half an inch. Mask both sides of the joint with painter’s tape, leaving roughly a 5 mm channel. Then cut the cartridge tip at a 45-degree angle to a width matching the gap, and puncture the inner foil seal on silicone products before application. Squeeze the trigger gently until flow begins, then move along the seam in a smooth continuous motion at consistent speed and pressure, filling the joint without gaps or piling. Tool or smooth the bead with a finishing tool before the sealant skins over, pull the tape away immediately at a shallow angle while the material is still wet, and leave it alone to cure.
Where You Should Never Put Sealant
This section prevents more damage than any other. Weep holes allow moisture behind the window to exit the frame, and if you caulk over them the moisture has nowhere to go — they are the small slots along the bottom of the exterior frame, standard on most vinyl, aluminum, and wood units, and they must stay clear. When they are blocked, water backs up into the frame and eventually into the wall. Leave the sashes, tracks, and any moving hardware alone, and skip the drip cap or flashing above the frame, since flashing and drip edges manage drainage and sealing them traps water. Storm windows follow their own rule: it is fine to caulk the top and sides, but never around the bottom, because winter condensation collects on the inside and sealing the bottom prevents drainage, causing mold, mildew, and rot in the sill and frame. There is also a warranty angle worth knowing — applying caulk where it is not needed can void a window warranty, as manufacturers often exclude repairs caused by improper treatment.
Timing, Weather, and How Long the Job Takes
Conditions matter more than most DIY guides admit. Sealant is optimally applied between 40°F and 80°F (4°C and 27°C), and while some 100% silicones carry far wider ratings — one common product specifies an application range of -35°F to 120°F — cold affects silicone, butyl, and polyurethane alike, with delayed cure and inadequate adhesion the usual consequences. Never apply to a wet substrate or immediately ahead of rain, and choose a day with the smallest gap between daytime and night-time temperatures, so the fresh bead is not forced to expand and contract while it is still curing; spring and autumn tend to offer the steadiest conditions. Cure times depend on the product, but a representative figure is useful: at 73°F and 50% relative humidity, one widely sold silicone is water resistant in 30 minutes, tack-free within an hour, and fully cured in 24 hours, with cooler or more humid weather extending that. Allow roughly 30 to 60 minutes of working time per average window including removal and cleanup, so a typical six-window elevation is a comfortable one-day project.
Window Seal Repair Costs: DIY vs. Hiring a Pro
Published cost data on this varies widely, and homeowners should treat any single figure with caution because sources define “window seal repair” differently. At the simplest end, DIY materials come in around $15 to $18 per seal, against professional resealing quoted at roughly $44 to $91 per seal nationally and $75 to $150 per window for repairing a compromised seal with caulk or partial gasket replacement, rising to $100 to $250 for full seal replacement. Labor typically runs $30 to $90 per hour depending on location and experience. Costs climb sharply once glass is involved: triple-pane seal repairs run $100 to $700, and bay or bow windows $250 to $1,000, while a fogged double-glazed unit swap is commonly quoted at $180 to $520. Some aggregators publish far higher national averages — Thumbtack, for instance, cites a range of about $570 to $705 — most likely because their figure bundles sash or glass replacement rather than perimeter caulking. All of these are regional estimates that shift with local labor rates, access difficulty, and window type, so get three written quotes before committing. Straightforward ground-floor perimeter work is well within DIY reach; anything involving glass units, rotted frames, or upper stories usually is not.
Safety Precautions Worth Taking Seriously
Most of the risk in this job has nothing to do with the sealant. Upper-story exterior windows mean ladder work, and falls are the realistic hazard — use a stable, correctly angled ladder on firm level ground, never overreach past your belt buckle, and if the window cannot be reached safely from the ground or a secure platform, hire someone equipped for it. Wear safety glasses when scoring and scraping, since hardened caulk fragments and glass shards flick unpredictably, and use nitrile gloves with chemical removers, working in ventilated conditions and following the product’s safety data sheet. If you soften old material with a heat gun, keep it moving and off the glass, as concentrated heat can crack a pane. Homes built before 1978 in the United States may have lead-based paint on window trim — sanding or scraping it releases hazardous dust, and testing first or bringing in an EPA lead-safe certified contractor is the right call. Finally, if you find soft, spongy wood while removing old sealant, stop and assess; sealing over rot hides a structural problem rather than fixing it.
Common Mistakes That Kill a New Seal Early
The failures repeat with remarkable consistency. Caulking over old material tops the list — applying new caulk over old or damaged caulk leads to poor adhesion and ineffective sealing. Second is bridging an oversized gap with sealant alone instead of backing it with foam rod, which produces a thick bead that shrinks, sags, and splits. Third is using the wrong product for the exposure, most often interior acrylic on an exterior joint. Fourth is applying to a damp or dusty surface, which guarantees adhesion failure regardless of product quality. Fifth is peeling masking tape after the bead has skinned, which tears the fresh edge you just tooled. And sixth, quietly the most damaging, is over-caulking: many modern homes have trimmed-out windows sitting above the siding, where sealing the joints provides no benefit, and blanket-sealing every visible gap around a window traps water inside the assembly instead of letting the drainage design do its job.
Maintenance, Prevention, and When to Call a Professional
A resealed window is not a permanent fix, and planning for that is what keeps small maintenance from becoming water damage. Expect roughly 5 to 10 years from most window caulking, with silicone outlasting acrylic or latex, and faster degradation in areas with extreme temperatures, heavy rainfall, or high humidity. Inspect at least once a year — ideally twice, before winter and before spring — and check both sides, because exterior caulking commonly fails years ahead of interior work, particularly on south and west-facing windows that take the most sun. Keep weep holes clear as part of that routine; pour a little water into the window track and confirm it drains out through the weep hole outside, or spray the outer frame with a hose and watch for free flow. Call a professional when you see fogging between panes, rot in the frame or sill, repeated seal failures in the same joint (which can indicate frame movement or a settlement issue), or when the window is out of safe reach. As deep cracks, rot, or moisture between panes all warrant expert attention, as does any uncertainty about removing old sealant safely — and given that the Department of Energy identifies caulking and weatherstripping as among the simplest and most effective air-sealing measures, often paying back within a year, spending a little on the right diagnosis rarely goes to waste.
Conclusion
Learning how to reseal windows properly is less about mastering a caulk gun and more about diagnosing correctly, choosing a sealant matched to the surface and climate, and knowing which gaps the window needs left open to drain. Get those three right and a weekend’s work with under $20 of materials per window buys years of reduced drafts, lower energy loss, and — more valuable than either — protection against the slow water intrusion that turns a $15 repair into a rotted frame. Get them wrong and you either repeat the job next year or trap moisture where it does real damage. Start with an honest inspection of every window on the house, fix the perimeter joints yourself where access is safe and the failure is clearly in the caulk, and bring in a professional for fogged glass units, rot, or anything above ground level. Then put an annual seal check on the calendar so the next round of window seal repair stays a maintenance task rather than a claim.
Also read: Fire Stopping Regulations UK: A Practical Compliance Guide for 2026
FAQs
How often should you reseal windows?
Most window caulking lasts five to ten years. Inspect annually, ideally before winter and spring, and reseal sooner if you see cracking, shrinkage, gaps, or peeling anywhere along the bead.
Can you caulk over old window caulk?
No. New sealant applied over old or damaged caulk adheres poorly and fails quickly. Cut out and scrape away all existing material, then clean and dry the joint before reapplying.
What is the best sealant for exterior windows?
Use 100% silicone or a quality hybrid formula for exteriors, as both resist UV, moisture, and temperature swings. Choose paintable products if the joint will be painted afterwards.
Does resealing fix foggy double-pane windows?
No. Fogging between panes means the insulated glass unit itself has failed, allowing moisture inside. That requires glass unit replacement, typically costing several hundred dollars per window.
What temperature is too cold to caulk windows?
Most manufacturers recommend applying between 40°F and 80°F. Below roughly 35°F, standard caulk stiffens and cures poorly, though some specialist cold-weather formulations are rated far lower.
How much does it cost to reseal a window?
DIY materials run about $15 to $18 per seal. Professional resealing typically costs $44 to $150 per window, though quotes vary considerably by region, access, and window type.