
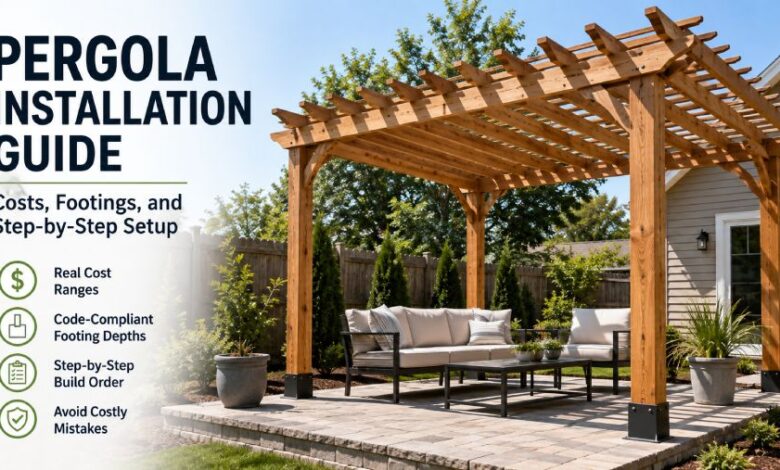
Pergola installation is the process of anchoring vertical posts to a stable foundation, leveling support beams across them, and fastening rafters overhead to create a permanent shade structure and the foundation stage, not the framing, is what determines whether it still stands straight in fifteen years. Most homeowners searching for this topic want three answers at once: what it costs, whether they can do it themselves, and how to keep the structure from racking, sinking, or heaving after the first hard winter. This guide walks through the full sequence from site layout to final sealing, with the footing dimensions, permit thresholds, cost ranges, and hardware specifications that generic build tutorials tend to leave out.
What Pergola Installation Actually Involves
A pergola is an open-frame outdoor structure supported by posts and cross beams, with a slatted or open roof rather than a solid one which is why it filters sunlight instead of blocking it, and why a pergola without top slats or a canopy provides very little real shade. Installation breaks into four distinct phases: layout and site preparation, foundation and post anchoring, beam and rafter framing, and finishing. The framing phase is the part people photograph, but it is the least likely to fail. The foundation phase carries almost all the structural risk, because an open frame behaves like a sail in wind and generates uplift and lateral racking forces that pull posts sideways and upward, not just downward. Understanding that load path early changes how you approach every decision that follows, from post size to fastener choice.
Freestanding Versus Attached Pergolas
A freestanding pergola stands on four or more posts of its own, while an attached or wall-mounted pergola carries one edge on a ledger board or brackets fastened to the house framing. Attached designs cost roughly 10 to 20 percent less because they need fewer posts and fewer footings, and they suit narrow patios where a full four-post footprint will not fit. The trade-off is regulatory and structural: attached pergolas are far more likely to trigger permit review, and the wall connection must land in structural framing, not just siding or sheathing, with the penetrations flashed and sealed to keep water out of the wall cavity. A poorly detailed ledger is one of the few pergola failures that damages the house itself rather than just the structure. If your wall is brick veneer, stucco, or has gutters running along the attachment line, the connection becomes specialized work and the cost advantage largely evaporates.
How Material Choice Changes the Installation
Wood, aluminum, vinyl, and fiberglass each change the tools, timeline, and long-term upkeep of a pergola installation. Pressure-treated pine is the budget option and typically lasts 10 to 15 years, dropping toward the low end of that range in humid or high-rainfall regions once the treatment weakens. Cedar and redwood resist rot and insects naturally, weather to a silver-gray if left unfinished, and can exceed 20 years with consistent maintenance. Aluminum and vinyl systems skip the cutting and notching entirely components arrive predrilled and bolt together and generally last 20 years or more with little upkeep, though louvered and motorized aluminum systems occupy a much higher price bracket. Material also affects anchoring: heavier timber sections load footings harder, while lightweight aluminum frames with solid roof panels catch more wind and demand better uplift resistance. Match the anchoring detail to the material and the roof style, not to a generic plan.
Permits, Codes, and Property Line Rules
Call your local building department before you buy materials, because two separate rule sets apply: the building code governs how you build, and zoning governs where and how large. Many jurisdictions exempt small freestanding shade structures below a footprint threshold commonly 120 to 200 square feet while attached pergolas, taller structures, or anything with a solid roof frequently require permits and inspections. Zoning adds setbacks from property lines and easements, lot coverage caps, and height limits that apply even when no permit is needed. Structures above roughly 12 feet tall or 200 square feet often require stamped engineering, and building departments will reject generic online plans or kit instructions unless the manufacturer supplies engineering for your specific wind and snow load zone. Northern states commonly require a footing inspection before framing begins. If you have an HOA, secure architectural approval separately and before ordering, since HOA rules operate independently of municipal code.
Tools and Materials You Will Need
A typical wood pergola installation calls for a post-hole digger or powered auger, a wheelbarrow or mixing tub, batter boards and mason’s line, a 4-foot spirit level plus a post level, a laser or line level for setting beam heights, a circular saw, a drill and impact driver, a hammer drill with masonry bits if you are anchoring to concrete, clamps, and a sturdy ladder or two. Materials include posts sized 4×4 or 6×6 depending on span and wind exposure, beams and rafters, bagged concrete, compacted gravel for drainage, galvanized standoff post bases, structural carriage bolts with washers and nuts, hurricane or uplift ties for the rafter-to-beam joints, and exterior-grade sealant or stain. Hardware grade matters more than most homeowners expect. Stainless steel fasteners resist corrosion far longer than standard galvanized, and in coastal or salt-air environments, galvanized hardware can show significant corrosion within 5 to 10 years even though it lasts decades inland.
Step-by-Step Pergola Installation Process
Start by calling 811 to have public utilities located, then check privately for irrigation lines, landscape lighting, and septic laterals, which the free service will not mark. Set batter boards and mason’s string to establish the footprint, then square the layout by measuring both diagonals and adjusting until they match exactly every downstream error compounds from this step. Dig or drill the footings to depth, add gravel, pour concrete, and set the post bases into or onto the cured pier at the precise layout points. Stand and plumb the posts, brace them temporarily in two directions, and confirm they remain plumb before fastening. Cut and lift the main support beams onto the post tops, clamp them, verify level across the full run, then drill through and secure with structural bolts. Space the rafters across the beams with equal overhangs, tie each joint with uplift connectors or structural screws, and add top purlins if you want meaningful shade. Finish with diagonal knee braces and sealant.
Footing Depth and Anchoring Requirements
Footing size is where guesswork causes the most expensive failures, so treat these dimensions as the working baseline and confirm them against local code. As a general rule, 4×4 posts on firm soil need piers roughly 12 inches in diameter, while 6×6 posts or windy sites justify 16 to 18 inches. Depth must reach undisturbed soil and extend below the local frost line, which runs roughly 36 to 48 inches in New York, Vermont, Massachusetts, and Michigan, and may be as shallow as about 12 inches in warm climates where the ground rarely freezes. Place 4 to 6 inches of compacted gravel at the bottom for drainage, keep the top of the concrete 2 to 4 inches above finished grade so water sheds away, and avoid leaving a mushroomed cap that frost can grip. Critically, never encase wood posts directly in concrete. Use galvanized standoff bases anchored to the cured pier, which keeps end grain out of standing water and allows fine adjustment during setting.
Installing on Concrete Patios, Decks, and Pavers
Existing hard surfaces look like a shortcut, and sometimes they are not. A typical backyard patio slab is 3 to 4 inches thick and was never designed for concentrated post loads or uplift, so anchoring directly to it can pull the anchors out or crack the slab. Test the thickness and confirm whether the slab is frost-protected before trusting it; where it does not qualify, contractors saw-cut openings and pour dedicated footings below frost depth, then patch around the post bases. When you do anchor to qualifying concrete, respect edge distance setting a post base within a few inches of a slab edge or control joint invites concrete breakout under load and use wedge or screw anchors rated for the slab thickness. On decks, posts must tie into the deck’s structural framing rather than the decking boards, with tension ties running down to the foundation. Floating pavers and on-grade deck blocks are not acceptable foundations in freezing climates.
Pergola Installation Cost in 2026
A professionally installed pergola typically costs between $2,100 and $6,400, with the national average landing around $4,200 for roughly 100 square feet, though prices vary considerably by region, material, and site conditions. Broken down by material, wood runs about $22 to $40 per square foot, vinyl around $10 to $25 for materials, and aluminum louvered systems $55 to $95 or more per square foot, with premium motorized units climbing past $95 to $180. DIY kits range from about $700 to $5,000 depending on size and material. Labor alone generally runs $500 to $1,500 for a straightforward prefab kit and $2,000 to $4,000 or more for a custom build. Budget separately for the extras that surprise people: permits at $100 to $500, site leveling or concrete work, and electrical wiring for fans or lighting at roughly $500 to $2,000 installed by a licensed electrician. Always confirm what a contractor’s quote includes before signing.
DIY Versus Hiring a Professional Installer
An experienced DIYer with one helper can assemble a standard kit in one to two days, though a from-scratch build with poured footings stretches longer because concrete needs several days to cure before you load it. The honest dividing line is not carpentry skill it is foundation work and code exposure. If your site has a slope, expansive clay, a deep frost line, high wind or snow loads, or you are attaching to the house, the consequences of getting the footings or ledger wrong are structural and expensive to reverse. Those two phases are worth having reviewed or performed by someone who understands local load requirements even if you frame the rest yourself. Kits with predrilled components and manufacturer engineering shift the odds meaningfully toward a successful DIY pergola installation. Custom timber builds, permitted projects requiring inspections, and anything over 12 feet tall generally belong with a contractor who handles design, permitting, and inspection scheduling as part of the job.
Safety Precautions and Common Mistakes to Avoid
Overhead work with heavy beams causes most pergola installation injuries, so never lift a beam onto post tops without at least two helpers and a stable ladder, wear a hard hat during overhead assembly, and keep posts braced in two directions until the beams are permanently fastened. Do not dig before utilities are located, and stop immediately if you hit an unmarked line. Beyond safety, the recurring build errors are predictable: failing to square the layout with matching diagonals, sizing footings by eye, setting piers on disturbed backfill instead of undisturbed soil, burying wood posts in concrete, omitting uplift connectors at rafter joints, skipping diagonal knee braces that prevent racking, and over-notching rafters with deep birds-mouth cuts that reduce the member’s effective depth and weaken it. Rafter spacing of roughly 12 to 16 inches is a shade preference rather than a structural rule; the actual spacing your build can support depends on rafter span and section size.
Seasonal, Regional, and Long-Term Maintenance Considerations
Climate should drive both your build schedule and your upkeep plan. Pour footings when the ground is workable and above freezing, and give concrete its full cure before loading the frame. If you use pressure-treated lumber, wait until the wood has dried often 2 to 3 months depending on climate before staining or painting, or the finish will not bond. After installation, wash the structure twice yearly with a soft brush and garden hose rather than a pressure washer, which strips soft wood fibers and streaks the surface. Reseal or restain roughly every 2 to 4 years, more often on south-facing surfaces and in coastal areas where salt air can cut finish life to 1 to 2 years. Inspect annually for loose fasteners, corrosion, splitting, and rot at the post bases, and trim back vines and overhanging limbs that trap moisture against the wood. Consistent upkeep is the difference between a wood pergola lasting five years and lasting twenty.
Conclusion
A pergola installation succeeds or fails below ground long before anyone judges the rafter overhangs. Square the layout with matching diagonals, size and depth the footings for your soil and frost line, keep wood off the concrete with standoff bases, and connect every joint with hardware rated for uplift rather than just gravity and the structure will hold its geometry through decades of wind, freeze-thaw, and sun. Confirm your permit thresholds and setbacks with the local building department first, because retrofitting a non-compliant structure costs far more than a phone call. Whether you assemble a kit over a weekend or hire a crew for a custom timber build, budget realistically in the $2,100 to $6,400 range for professional work, plan for site prep and permits on top, and commit to resealing on a regular cycle. Do those things and the shade you build this season will still be there in twenty years.
Also read: Emerald Green Arborvitae: Spacing, Cost, and Care That Actually Work
FAQs
Do I need a permit for a pergola?
Requirements vary by city. Freestanding pergolas under roughly 120 to 200 square feet are often exempt, while attached, tall, or roofed structures usually need permits and inspections.
How deep should pergola footings be?
Footings must reach undisturbed soil below the local frost line, roughly 36 to 48 inches in northern states and about 12 inches where ground rarely freezes.
Can you install a pergola on an existing concrete patio?
Only if the slab is thick enough, frost-protected, and structurally sound. Many backyard slabs are not, so contractors often saw-cut openings and pour dedicated footings instead.
How much does pergola installation cost?
Professionally installed pergolas typically run $2,100 to $6,400, averaging near $4,200 for about 100 square feet. Kits cost $700 to $5,000 before labor or site preparation.
How long does a pergola installation take?
Kit assembly usually takes one to two days with a helper. Custom builds with poured footings take longer because concrete needs several days to cure fully.
How long does a wooden pergola last?
Pressure-treated pine typically lasts 10 to 15 years, while well-maintained cedar can exceed 20. Resealing every two to four years and using stainless hardware extends lifespan considerably.

