
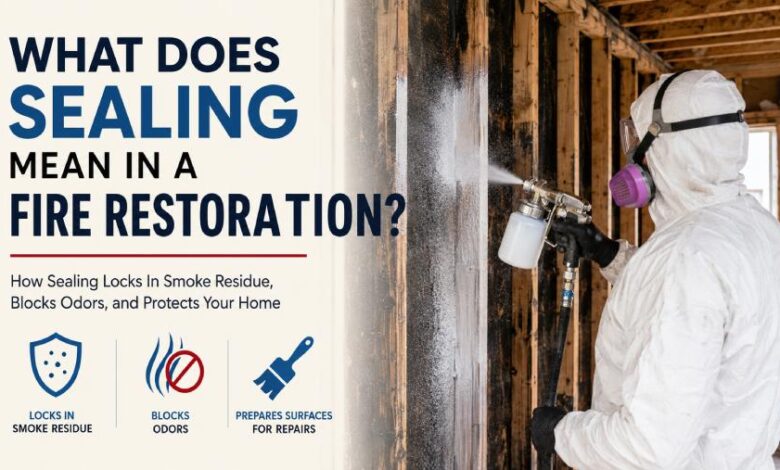
What does sealing mean in a fire restoration? Sealing is the step where restoration technicians apply a specialized odor-blocking coating over cleaned structural surfaces, such as wood framing, subfloors, drywall, and concrete, to permanently lock in the microscopic smoke residue that cleaning alone cannot remove. It happens near the end of the mitigation phase, after demolition, soot removal, and deodorization, and right before rebuilding and repainting begin. I have walked through plenty of homes where the owner swore the fire smell was gone in winter, only to have it creep back the first humid week of summer, and in almost every case the missing step was sealing. In this guide, I will explain exactly how sealing works, where it fits in the restoration timeline, which sealers professionals actually use, what the work typically costs, whether you can do it yourself, and the mistakes that cause smoke odor to return even after thousands of dollars of cleanup.
What Sealing Actually Does After a Fire
When homeowners ask me what sealing means in a fire restoration, I tell them it serves three jobs at once, and understanding all three explains why restoration contractors treat it as non-negotiable on anything beyond light smoke damage. First, it encapsulates odor: the sealer soaks slightly into the surface of the material and then cures into a continuous film that traps remaining smoke molecules inside, so they can no longer off-gas into your living space. Second, it blocks stains, because soot, char marks, and heat discoloration are notorious for bleeding straight through ordinary latex paint, sometimes within a few weeks of repainting. Third, it primes the surface, since fire-affected drywall and lumber rarely hold finish paint well on their own, and a proper sealer gives new coatings something stable to grip. Trade guidance from restoration industry publications notes that an effective blocking film generally needs to cure at around 3 mils of dry thickness on smooth surfaces, which is noticeably heavier than a standard coat of wall paint. That thickness requirement matters in practice: a technician who mists on one thin pass is not sealing anything, no matter what the product label promises.
Why Smoke Odor Comes Back Without Sealing
Smoke is not just a smell floating in the air; it is a cloud of microscopic particles, many of them smaller than 2.5 microns, which is small enough to penetrate below the surface of porous building materials. Framing lumber, drywall paper, oriented strand board, unsealed concrete, and mortar joints all absorb these particles deep into their pores during and after a fire. Professional cleaning with dry chemical sponges, HEPA vacuums, and degreasing agents removes the residue sitting on the surface, and deodorization treatments like thermal fogging or hydroxyl generators neutralize much of the odor in the air and near-surface layer. What none of those methods can do is extract every particle embedded a few millimeters into a charred stud. Those trapped particles release odor slowly, and the release speeds up when materials warm and take on humidity, which is exactly why so many homeowners notice the fire smell returning on the first hot, muggy day after an otherwise successful cleanup. Sealing solves the problem from the other direction: instead of chasing every last particle out, it locks whatever remains permanently inside the material.
Signs Your Fire-Damaged Home Needs Sealing
Not every smoke event calls for sealing, so it helps to know the indicators professionals look for during an assessment. The clearest sign is visible charring or scorching on structural members, because charred wood holds enormous amounts of odor and almost always gets either replaced or sealed. Persistent smoke smell after thorough cleaning is another strong indicator, especially if the odor intensifies in warm weather or when the HVAC system runs. Yellow-brown discoloration on walls and ceilings that reappears after wiping, or stains that bleed through a test patch of primer, tell you the residue has penetrated the surface rather than sitting on top of it. Protein fires deserve special mention here: a kitchen fire involving burned meat or grease leaves a thin, nearly invisible film with a rancid odor that clings stubbornly to every surface in the airflow path, and homes with protein fire damage often need sealing even when nothing looks burned. If your fire restoration contractor recommends sealing in any of these situations, they are not padding the invoice; they are protecting the result you are already paying for.
Where Sealing Fits in the Fire Restoration Timeline
Sequence is everything in fire restoration, and sealing has a fixed position in it. The process starts with securing the property and assessing damage, followed by demolition of materials too far gone to save, such as heavily burned drywall, insulation exposed to smoke, and structurally compromised lumber. Next comes water mitigation, since firefighting typically soaks the structure, and everything must be dried before any coating touches it. Cleaning follows, targeting soot and residue on every salvageable surface, and then deodorization treatments address odor in the air and contents. Only after cleaning is verified and moisture readings confirm the structure is dry does sealing happen, applied to the exposed framing, subfloor, and remaining wall surfaces. Reconstruction comes last, with new insulation, drywall, paint, and flooring installed over the sealed skeleton of the house. The order matters for a simple reason: sealing over dirty surfaces traps loose contamination that ruins adhesion, and sealing over damp lumber can trap moisture inside the wall assembly, which invites mold. A good contractor will never let a painter near a fire job before the mitigation crew signs off.
Types of Sealers Used in a Fire Restoration
Restoration professionals choose among three main sealer chemistries, and each has a distinct role. Shellac-based sealers, with Zinsser B-I-N being the product most technicians reach for, are the traditional gold standard for severe smoke odor, protein fires, and charred framing; they dry fast, adhere to imperfect surfaces, can be applied in temperatures as low as roughly 10 degrees Fahrenheit, and form the tightest odor barrier available. Their downsides are real, though: shellac is the most expensive category, the alcohol carrier is flammable with strong fumes, and the cured film is impermeable to water vapor, meaning it can act as an unintended vapor barrier if applied to damp material. Oil-based, or alkyd, sealers penetrate well into porous masonry, concrete, and heavily textured surfaces and offer strong long-term stain blocking at a moderate price. Water-based restoration sealers have improved dramatically and are now the go-to for large-area spray work; the better formulations block odor while remaining permeable to water vapor, which lets residual moisture escape instead of getting trapped, and some manufacturers can supply permeability test data on request. There is no single sealer that handles every situation, which is exactly why experienced contractors match the chemistry to the fire type and the substrate.
How Professionals Apply Sealer After a Fire
On a real job, sealing is mostly airless spray work, because rolling a sealer into rough charred framing or textured surfaces takes forever and leaves gaps. Technicians mask off anything that stays, set up ventilation, and spray the exposed structure in overlapping passes, often back-rolling or back-brushing on rough lumber to work the product into cracks and checks in the wood. Coverage runs far lower than ordinary paint; a gallon that theoretically covers 400 square feet at a thin film may realistically cover only a third of that once you account for the heavier build an odor barrier requires plus the absorbency of burned wood. Many contractors use white-pigmented sealer on framing deliberately, since the opaque finish makes it easy to verify complete coverage and gives adjusters and inspectors visual confirmation the step was done. Attics, wall cavities, subfloor undersides, and the interior of framing bays all get attention, because odor does not respect the parts of the house you can see. Depending on cure requirements, recoat and rebuild can proceed within an hour for shellac products or up to 24 hours for oil-based formulas, so the sealing stage on a typical house fire usually adds one to three days to the project.
What Sealing Costs During Fire Restoration
Sealing is rarely priced as a standalone line item for homeowners, but the numbers behind it are worth knowing. Current cost guides put full fire damage restoration between roughly $3,000 and $51,000, averaging around $27,000, with most contractors quoting $4 to $7 per square foot for combined smoke, soot, and repair work. Within that scope, industry cost breakdowns place odor-blocking sealing and painting at about $2,000 to $8,000 for a typical affected area, and whole-structure odor problems that require extensive sealing can run $5,000 to $15,000. For context on the related steps, smoke damage restoration generally costs $200 to $1,200 per room, thermal fogging runs about $200 to $600, ozone treatment $1,000 to $3,000, and duct cleaning $275 to $700. Materials are a meaningful driver: professional shellac-based primer sells for roughly $50 to $60 per gallon, with five-gallon pails around $250 to $260, and a fire job can consume many gallons given the low effective coverage on burned wood. All of these figures are typical national ranges, and your actual price will vary with your region, the severity of damage, and the contractor you hire, so get itemized written estimates before committing.
DIY Sealing vs Hiring a Restoration Professional
Homeowners can reasonably handle sealing after a very small, contained incident, such as a single scorched wall from a candle or a minor stovetop flare-up, using a quart or gallon of shellac-based or high-quality stain-blocking primer from any hardware store after washing the area with a degreasing cleaner. Beyond that scale, the math changes quickly. A professional brings moisture meters to confirm the structure is dry, knows which materials must be removed rather than sealed, owns the airless spray equipment that makes full coverage achievable, and carries the product knowledge to match sealer chemistry to your specific fire. Just as important, most homeowner insurance claims for fire damage expect documented, industry-standard mitigation, and a DIY sealing job with no moisture readings or photos can complicate both your claim and a future home sale. There is also a genuine risk of doing harm: I have seen well-meaning owners spray shellac over damp framing and seal moisture into a wall, trading a smoke problem for a mold problem. My honest rule of thumb is that if the fire department came, or if more than one room smells of smoke, sealing belongs in a professional’s scope, not on your weekend list.
Safety Precautions When Working With Restoration Sealers
Sealers are effective precisely because they are aggressive coatings, and that demands respect during application. Shellac-based products use denatured alcohol as the carrier, which means the fumes are both intoxicating and flammable; pilot lights should be extinguished, the power to the work area considered carefully, and no one should spray these products in an enclosed attic or crawlspace without a supplied-air or properly cartridged respirator, since painters have been overcome doing exactly that. Oil-based sealers carry high VOC levels that require continuous ventilation and organic vapor cartridges, not paper dust masks. Even low-odor water-based products call for eye protection and gloves during spray application because atomized coating hangs in the air. Beyond the coatings themselves, remember what surrounds a sealing job: soot is a respiratory irritant and can carry toxic combustion byproducts, fire-damaged structures may have compromised framing or electrical wiring, and any home built before 1978 may have lead paint disturbed by the fire. Professionals work fire jobs in respirators, suits, and gloves for good reasons, and anyone attempting even small-scale sealing at home should ventilate hard, keep ignition sources away, and stop immediately if they feel lightheaded.
Common Sealing Mistakes That Let Smoke Odor Return
Most sealing failures trace back to a handful of predictable errors. The worst is sealing over surfaces that were never properly cleaned, which traps loose soot under the film, wrecks adhesion, and often lets odor migrate through gaps as the coating flakes. Close behind is sealing damp material, particularly with vapor-impermeable shellac, which locks moisture into lumber and sets up mold growth inside a finished wall. Applying too thin a coat is quieter but just as damaging, since an odor barrier that never reaches adequate film thickness simply is not a barrier, and burned wood drinks up sealer faster than people expect. Skipping hidden areas is another classic: technicians who seal only the visible faces of studs while ignoring wall cavities, subfloor undersides, and the attic side of ceiling framing leave odor reservoirs untouched, and the smell finds its way out. Using ordinary latex paint or a bargain primer in place of a true restoration sealer guarantees stain bleed-through within months. Finally, painting finish coats before the sealer fully cures can soften the film and compromise everything underneath it. Each of these mistakes is invisible on day one and expensive to discover on day ninety.
Does Insurance Cover Sealing After a Fire?
In most cases, yes. Sealing is a recognized, standard component of professional fire mitigation, so homeowner policies that cover fire and smoke damage generally cover sealing as part of the documented restoration scope, subject to your deductible and policy limits. The practical issues are usually about documentation rather than eligibility: adjusters want to see that sealing was justified by the damage, performed with appropriate products, and itemized in the estimate, which is one more argument for using an established restoration contractor who writes estimates in the software insurers expect. Where homeowners run into friction is with partial approaches, such as an insurer proposing cleaning and repainting without sealing on a job where odor clearly penetrated the structure; if that happens, ask your contractor to document odor sources and put the recommendation for sealing in writing. Also review whether your policy covers matching costs, since sealed and rebuilt areas need to blend with untouched ones. Every policy differs, so confirm specifics with your adjuster early, keep photos of all damage, and never authorize demolition or coating work before the insurer has had a chance to inspect unless safety demands it.
Conclusion
Sealing is the quiet step that decides whether a fire restoration actually holds up, because cleaning makes a house look recovered while sealing makes it stay recovered. If you take nothing else from this guide, remember the sequence: remove what cannot be saved, clean and dry everything that can, seal the structure with the right chemistry at the right thickness, and only then rebuild and repaint. Ask any contractor bidding your job to show you where sealing appears in their estimate, which products they intend to use, and how they will verify surfaces are clean and dry beforehand, because their answers will tell you quickly whether you are hiring a restoration professional or just a painter with a pressure washer. A fire is a miserable enough experience once; a properly sealed home is how you make sure you do not keep reliving it every humid afternoon for years to come.
FAQs
What does sealing mean in a fire restoration project?
Sealing means coating cleaned structural surfaces with a specialized odor-blocking primer that permanently traps embedded smoke residue, prevents soot stains from bleeding through, and prepares surfaces for repainting.
Can I just paint over smoke damage instead of sealing?
No. Standard latex paint is porous, so smoke odor migrates through it and soot stains bleed back within weeks. Clean first, seal with a blocking primer, then paint.
How much does sealing cost after a house fire?
Odor-blocking sealing and painting typically runs $2,000 to $8,000, and severe whole-structure odor can reach $5,000 to $15,000. Prices vary by region, severity, and contractor.
What is the best sealer for smoke damage?
Shellac-based sealers like Zinsser B-I-N block severe odor best, oil-based products suit concrete and masonry, and breathable water-based sealers work well where trapped moisture is a concern.
Does sealing completely remove the smoke smell?
Sealing encapsulates odor rather than removing it. Applied over properly cleaned, dry surfaces, it stops remaining smoke molecules from escaping, which effectively eliminates the smell inside the home.
How long does the sealing stage of fire restoration take?
Application on a typical house takes one to three days. Shellac sealers recoat within about an hour, while oil-based products may need up to 24 hours to cure.
